Showing posts with label Chain of Command. Show all posts

Saturday, 19 February 2022

1940 Fighting Withdrawal Campaign - Game Four


Germans (Blue) aim is to capture the area around the crossroad


Continuing our 'Fighting Withdrawal' campaign, Tom (BEF) and I (German), met again on Sunday for the next battle. Unlike the previous two, which used a tweak of the 'Probe' scenario, this one takes the 'Attack on an objective' plan.

The Germans arrive on the bottom edge of the table and need to capture the crossroads and building surrounding it in order to force the British to fall back. Again the Germans have the advantage in Support points, but not to as great an extent as in the last games.

I considered using some armour, but decided to deploy a Pre-game barrage, an IG18 (both standard choices for me!) and added an MG team and FOO to the supports, thinking to try to blast the British out of their positions before pushing in with an assault.


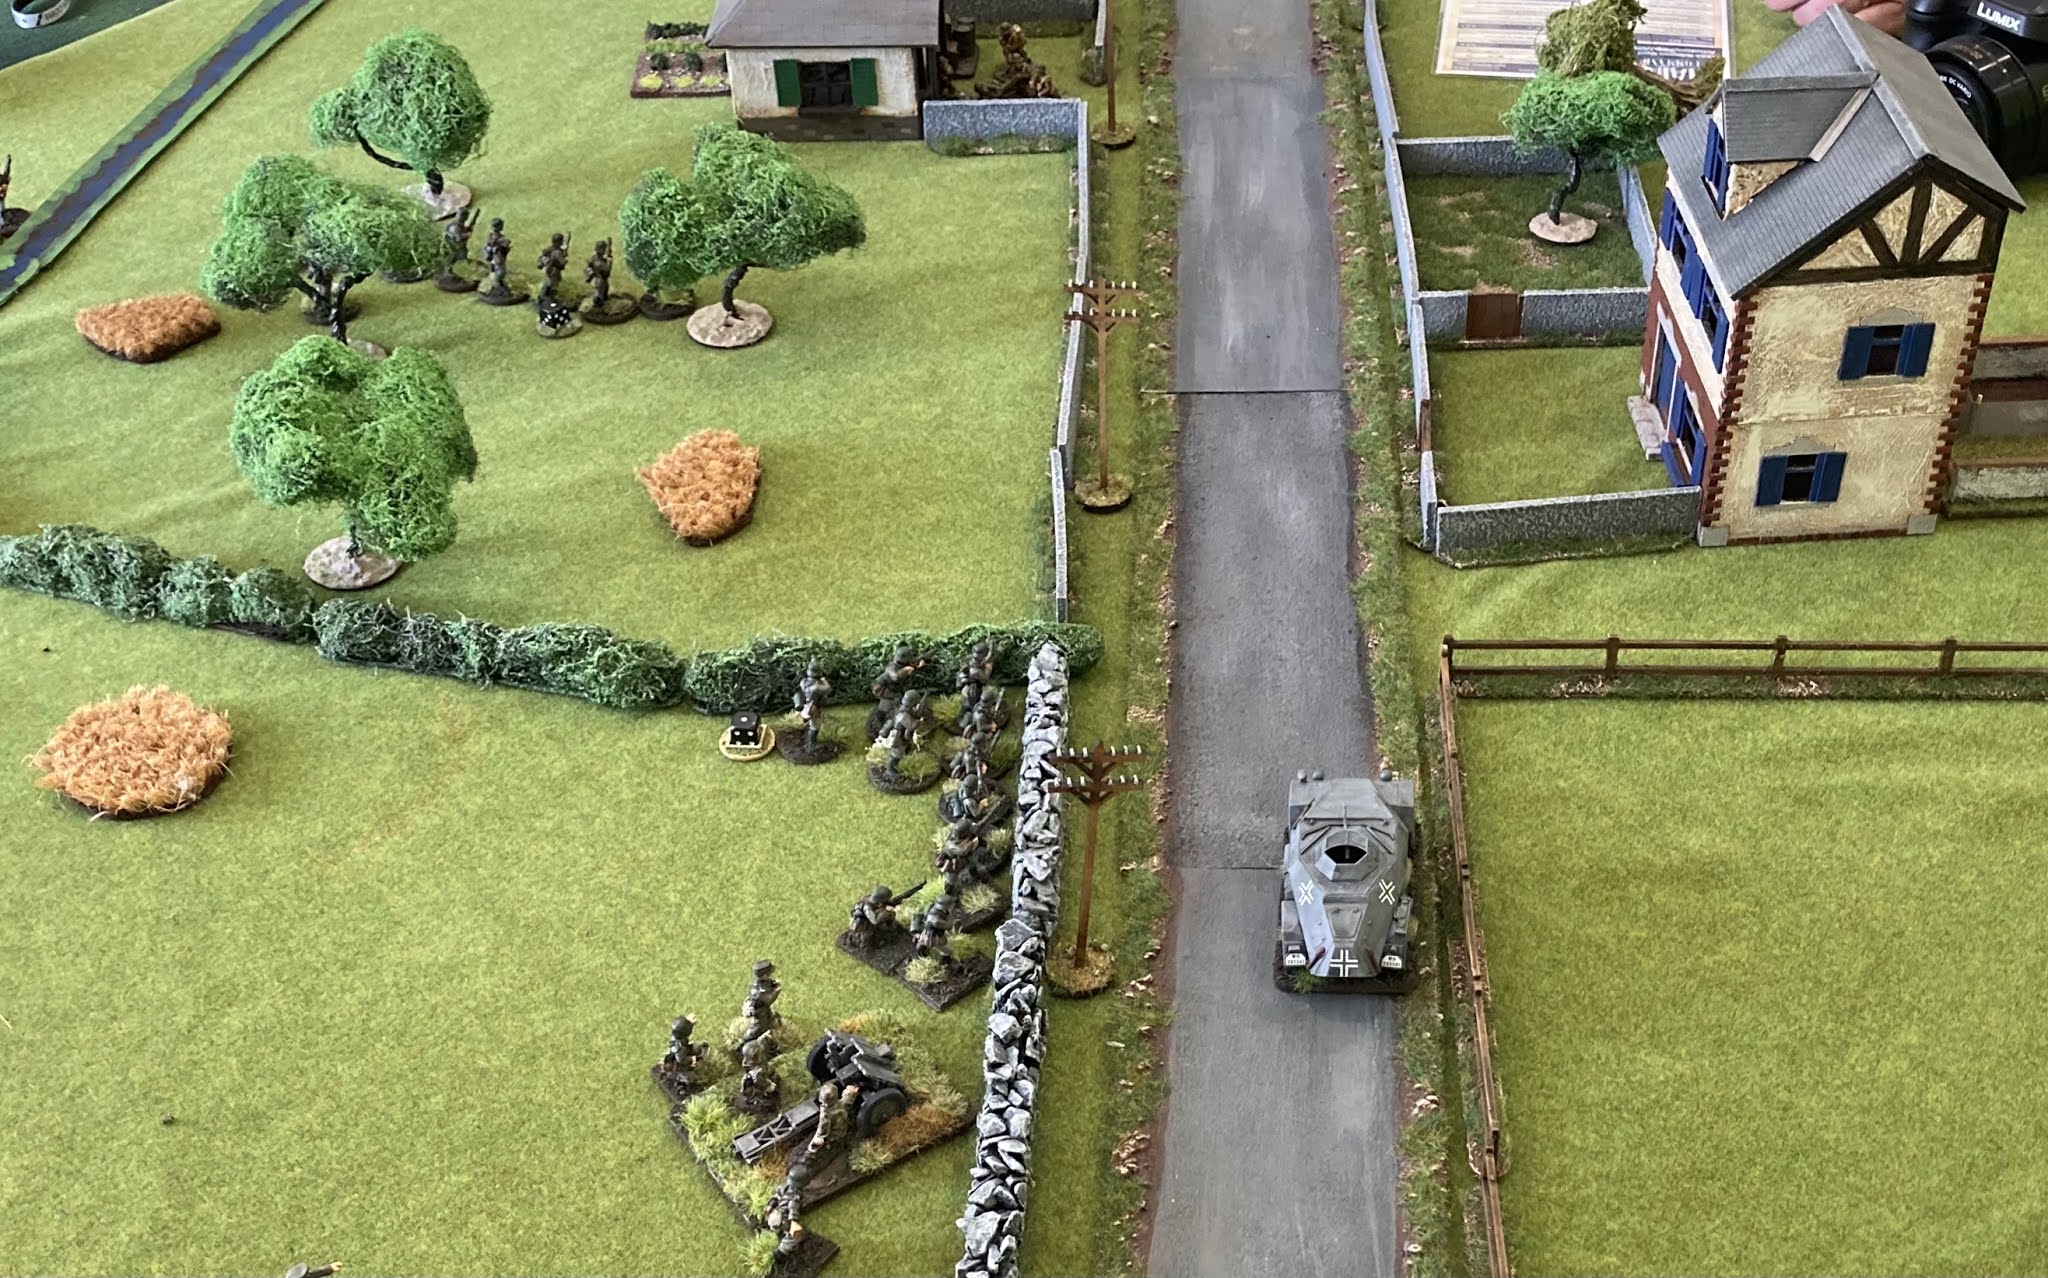
The 80mm mortar barrage was called in very efficiently in the first phases by the FOO and senior officer deployed in the building at C, whilst the MG team took up position in the small house on the eastern edge (B). 

80mm mortar round fall around the crossroads

Three infantry sections advanced from the south and east, Tom managed to end the turn twice, once with a triple six and once using a command dice, allowing a window of opportunity to deploy and fire on the approaching infantry as the barrage lifted. Although the FOO succeeded twice in calling back in the mortars, and despite pouring HE into the area, the British that had deployed in the buildings managed to avoid serious damage (although a Junior Leader did meet his demise). A Vickers MG team in particular, survived everything thrown at it, including HE from the IG brought in next to the house at C. As the phases passed, my rolls of 4s and 5s really weren't helping to get the sections moving and effective MG fire at close range in the open forced back two sections advancing from the south. The section rushing from the east made it up to the walls of the farm buildings, seeing off a sniper that had wounded their junior leader.. 


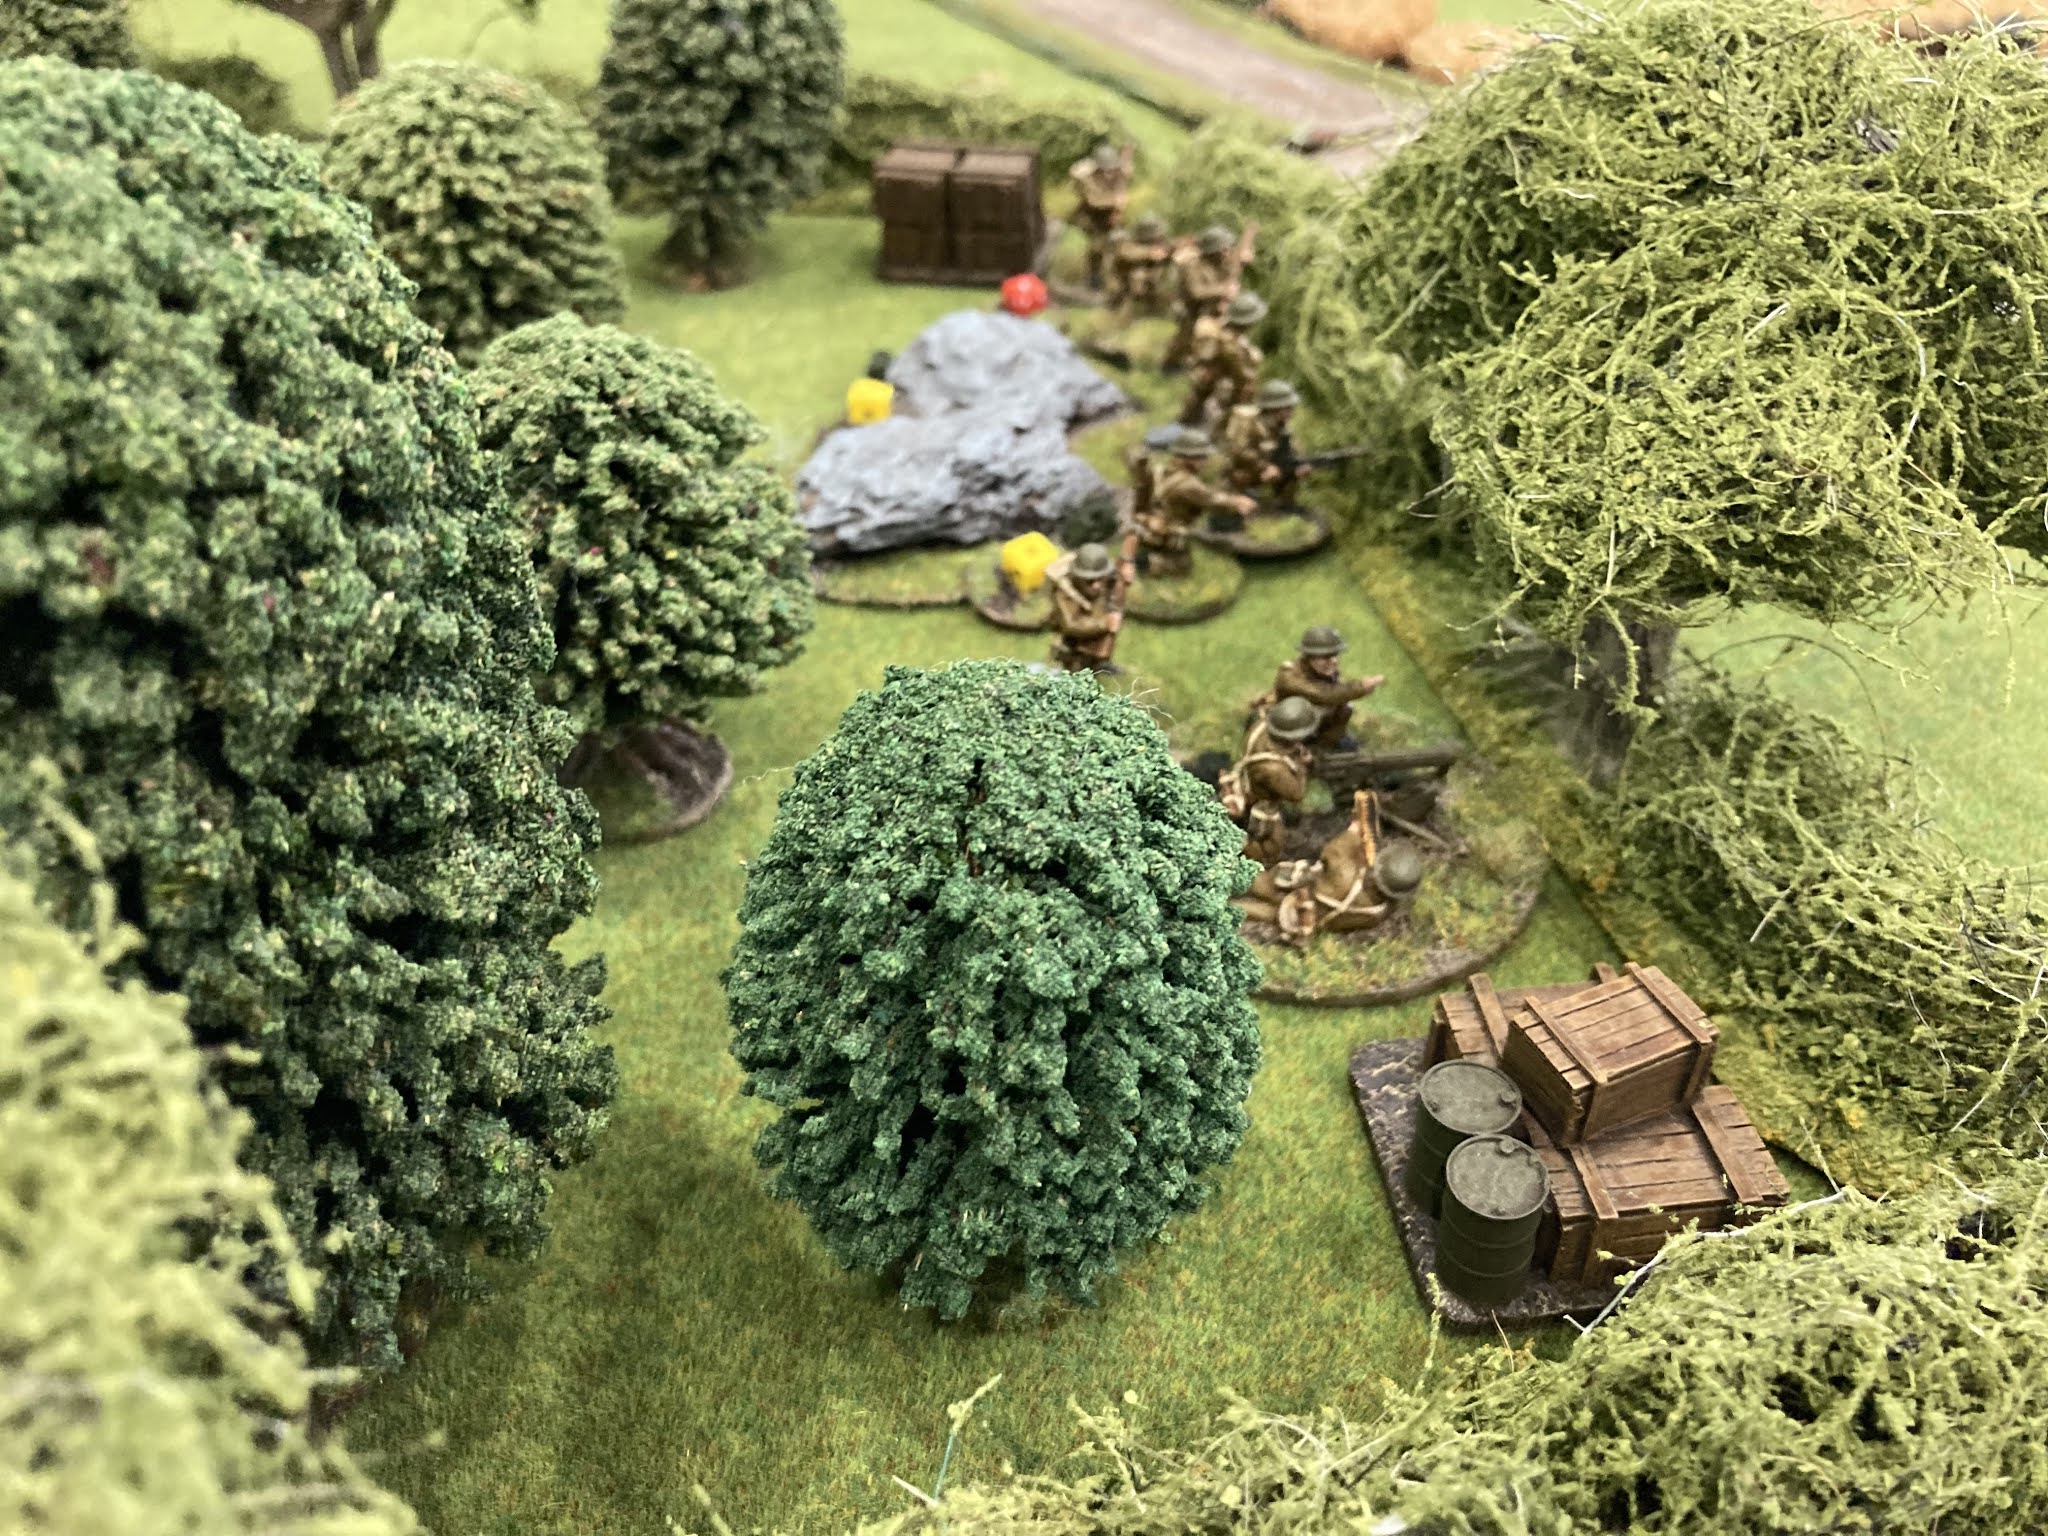
two sections start their advance from the south

some less than accurate German firing (followed later by a similar British volley)

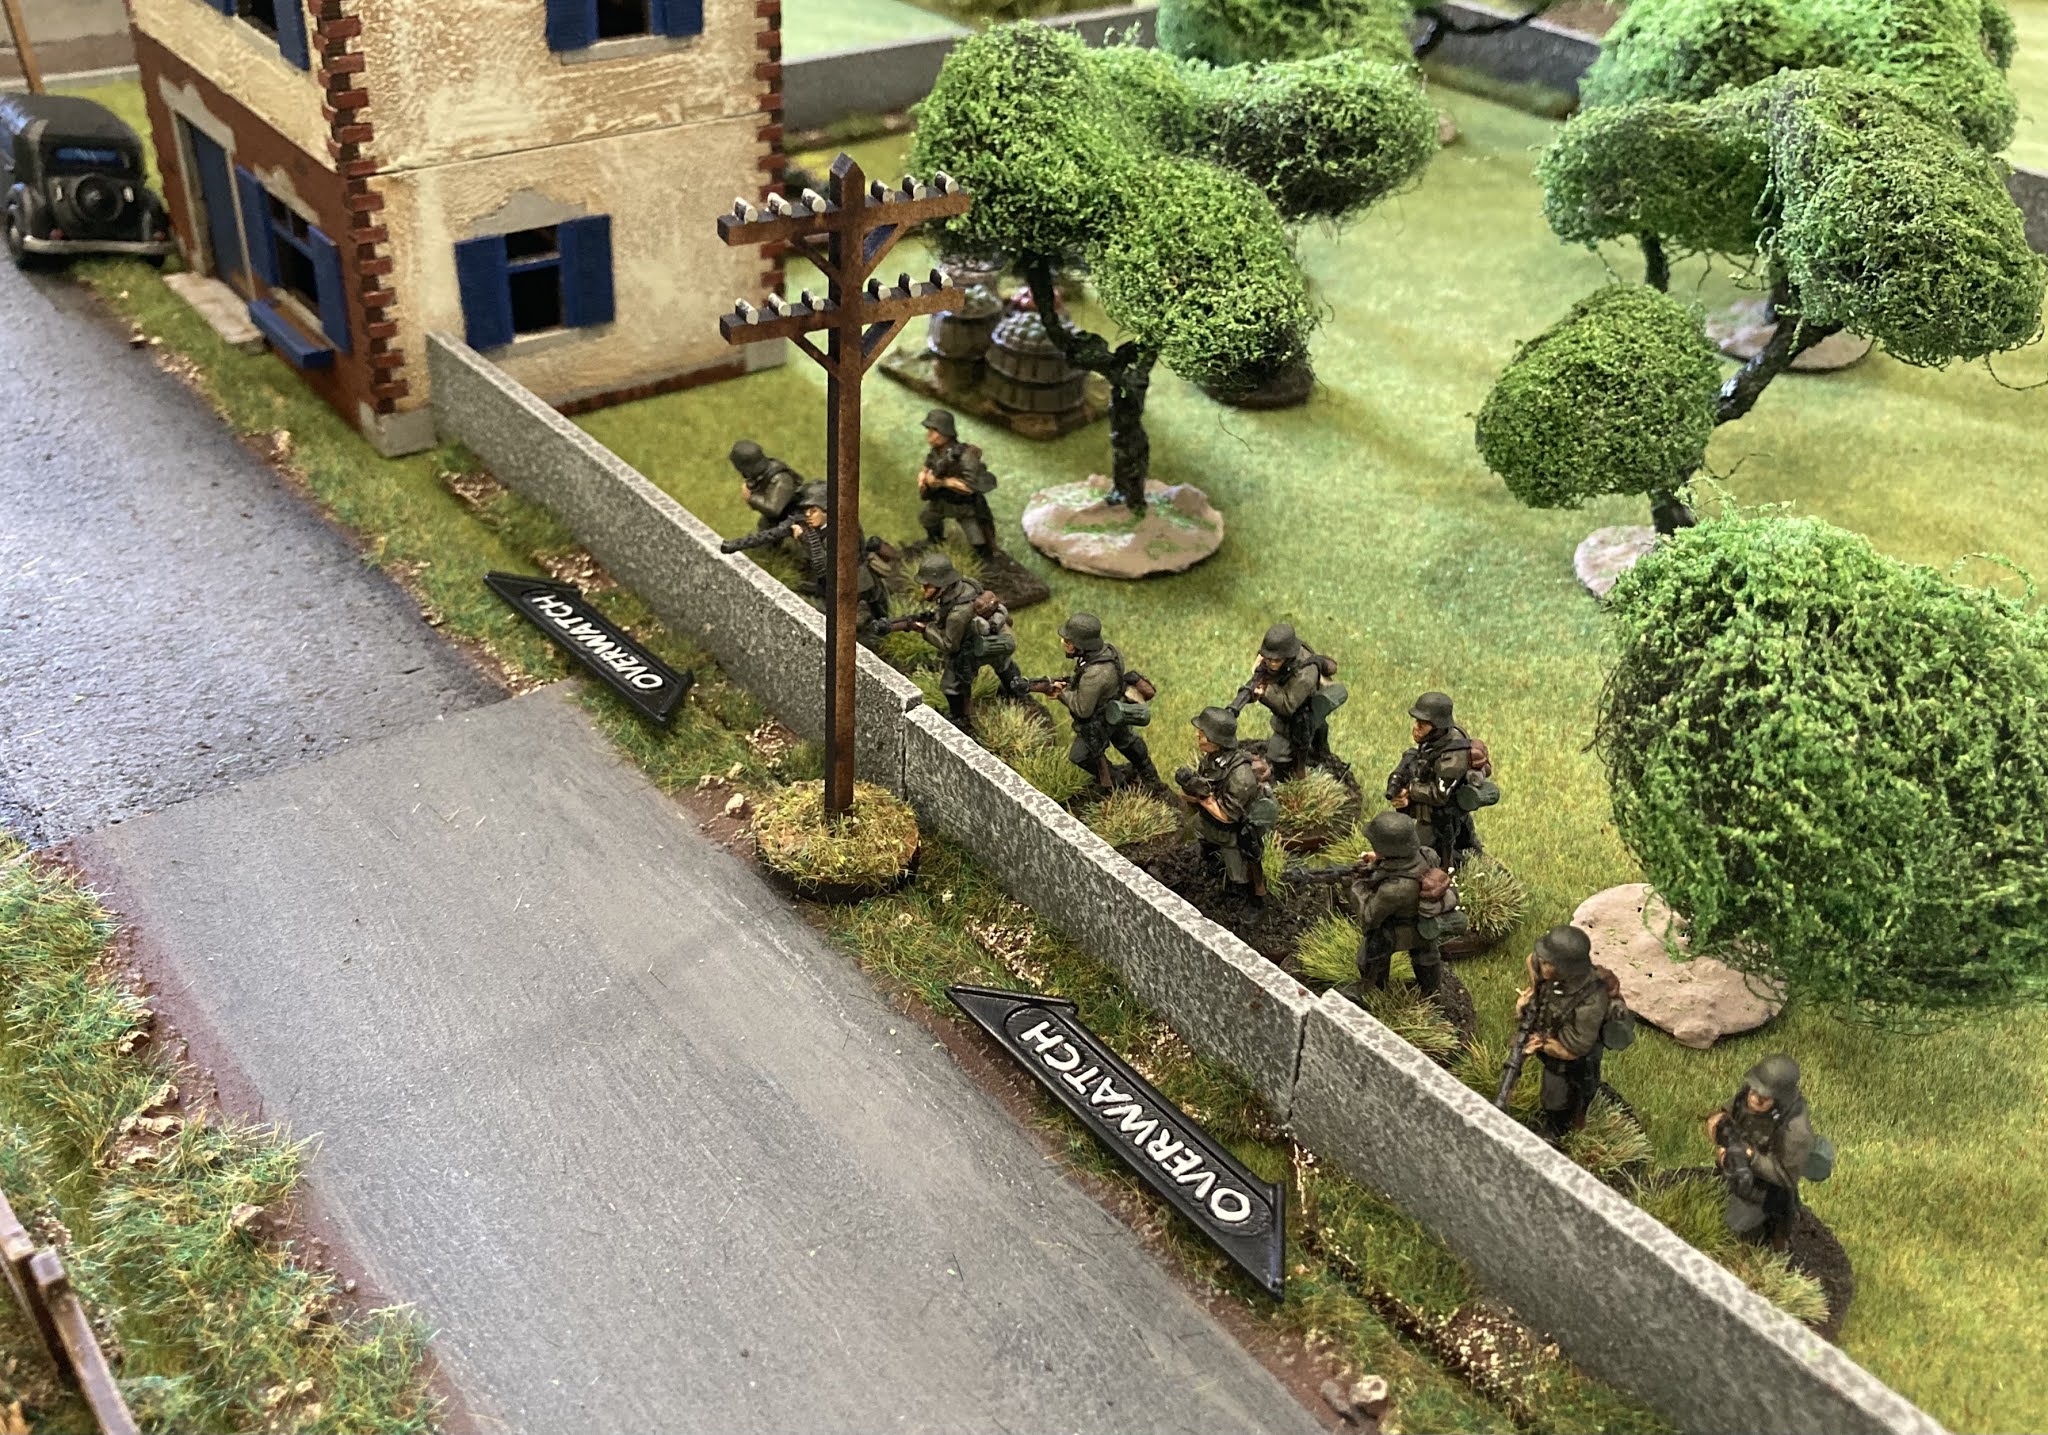
infantry creeping up to the crossroads, waiting for the mortar fire to stop so they can be destroyed by the Vickers in that building!


Not always effective, but always a pick for German support - the IG18

Just before they routed

Things were starting to look shaky for the Germans, with their force morale down to 4. However, they still have some support and another section to bring on, and the British, although in a good position, can ill afford to take too many casualties. 

The barrage ceased again, and this time the FOO struggled to call it back into play. In the meantime, British fire continued to whittle down the sections stuck in the open, and a lack of command dice didn't give the Germans the opportunity to move.. so, despite throwing as much fire into the buildings as they could, the Vickers and Senior Officer within held on, and the German morale eventually gave way, another section and junior leader being lost proving too much for them today.

On reflection, we did some things wrong, not enough to majorly affect the outcome, but every game is a learning one! I don't think tactically the Germans could have done much else.. the off table barrage I think was the right call, if nothing else providing smoke to cover the advance.. but the HE fire consistently failed to really cause enough damage, and a couple of ended turns didn't help to keep the momentum up.

I used up all my shock tokens!

On to the next game. We think that means playing this one again, with the Germans upping the supports to 18 points. They need to break through in 7 turns and this was turn four, with one scenario left to play in the campaign.

Read Tom's account of the game here.


Sunday, 13 February 2022

1940 Fighting Withdrawal Campaign - Game Three

Having made a surprisingly fast breakthrough in the last game, the advancing Germans came across the next line of British defence on the outskirts of Risquons Tous. A line of anti-tank ditches and barbed wire covered another bunker and stretched from the cemetery walls in front of the imposing hospital buildings.

The Germans were faced with another march across open ground into this defensive line, again with the objective to push at least one team off the British baseline ('Probe' scenario in Chain of Command). The fact that they had 12 points of support to the BEF 6 should help!

In addition, in this very one sided campaign, the Germans are the 'NPC' and don't need to worry about casualties from one game to another, whilst the BEF player needs to be much more careful about losses depleting his slim resources.


The patrol phase allowed me to place jump off points high up on both flanks whilst Tom deployed in the graveyard and made use of the hard cover in the building and bunker. 


A combination of double phases, a number of 5s giving me a chain of command dice, allowed me to push up the jump off points even further, and the use of a pre-game bombardment to stall British arrival, all meant that in very short time I had pretty un-battered infantry assaulting the line. 


The arrival of a Stug, pouring effective HE fire in to support, was enough and the British were very soon beating a hasty retreat back to the next defensive line.


Thursday, 28 October 2021

Opening games in the 1940 Fighting Withdrawal campaign - Part Two; Holding the line at Risquons Tout

Last night Tom and I played the next game in the 'Fighting Withdrawal' campaign. In this scenario, the Germans had one objective, as per the 'Probe' scenario.. get at least one team off the opposite side of the table.. very Blitzkrieg!

The scenario map, Germans attacking from the left

I actually gave a little thought the night before as to how to spend my generous support points. In this scenario the BEF have a pretty good defensive line along an Anti-tank ditch, with barbed wire and concrete bunker.  I opted for more firepower than speed, reasoning that it was likely that a roadblock would impede a wheeled or tracked dash for that end of the table. I chose a pre-game barrage to try to delay some deployment, along with an IG18 gun, some engineers and an off-table mortar battery.

The line of defence, German infantry pushing on the top

We had a cagey patrol phase.. neither of us too sure of our intentions and I definitely lucked out, Tom cursing his angles!


A Jump Off Point on the flanking edge, followed by a double phase and some good dice throws, found an infantry section rushing hard up on the one weak point in the British line. Tom managed to get some infantry deployed just before the 80mm mortars opened up, but the german gun crew put some fire into a section in the house, wounding the Junior leader there.

Despite the fact that the British Force morale was holding very well, some more lucky dice rolls ran the german section off the table and ended the game.


As it happened, the road had been left clear, and maybe deploying a 221 and gunning it might have yielded the same result? the Probe scenario is a tricky one to defend.

This was a really quick game, but it wasn't really a disappointment in that this is one chapter of the story. The British didn't suffer any losses and the next game sees them in a much tougher defensive position.. I suspect that I'll be hard-pushed to win that one on the first run!

See Tom's page for more photos and his account of the battle: 


Opening games in the 1940 Fighting Withdrawal campaign - Part One; Counter Attack at Avelghem

Tom and I have been planning for some time to play this 1940 campaign which we found in the 2016 Lardy summer special. Rather than a 'typical' pint sized campaign, where both sides track their losses and successes, this is much more of a narrative, a series of linked scenarios that follow the withdrawal of C Company of the Beds & Herts as they are pursued by the advancing Germans across Belgium and into France. 

Tom has taken charge of the BEF forces and I'm looking after the 'NPC' German forces (I don't need to track any losses and just need to keep piling it on to push the British back to Dunkirk).

Game One was the 'Counter Attack at Avelghem', where a small group of Germans had made their way across a demolished bridge, and Tom needed to push them back to prevent them forming a bridgehead. The table is quite open, drainage ditches providing some light cover.


German section on the bridge ramp took heavy aimed bren fire

British lined the ditches

Despite my initial doubts, the Germans managed to put quite a bit of damage onto the British and crucially manage to bring more forces over the river, although their morale was falling steadily.. Eventually Tom pushed forward, making really good use of smoke from his 2" mortars, and despite taking losses, managed to over-run a JOP. 


The assault goes in on the weakened German section


Shortly afterwards, I remembered that the Germans had a special rule; 'Handgranaten!'.. without hesitation, I decided that sounded like a great idea and soon learned that charging an enemy, even a weakened one, when your Force Morale is at 2 is really not a good idea! 


Game One, although a costly victory, went to the BEF. This will determine the number of games that are played. 

See Tom's write up and pictures here: 

http://tomstoysoldiers.blogspot.com/2021/10/chain-of-command-fighting-withdrawal.html


Saturday, 17 July 2021

Setback at Champ-de-Deuil.. a 1940 Chain of Command Game

This morning Tom and I had another 'warm up' game of Chain of Command before we start off our 'Fighting Withdrawal' campaign.

Having set up the table last night to save a little time, we both used forces from that campaign (TFL Summer Special 2016) and opted for the 'Patrol' scenario from the main rulebook. A roll of 1 meant that I would get 1 point of support for my Germans, I picked a medical orderly as I sighed and looked over my newly painted PzII sitting in the box... Tom would get a few more support points and a Vickers was to prove a very effective choice.

Unlike our last outing, the Germans got off to a better start.. random starting positions put me in the village (Champs-de-Deuil) whilst Tom would have a bit of a slog across the fields (or so I thought). Force morale rolls were not so great.. I started on 8 against the BEF  on 10.

Although I had a notion to play an aggressive game on this outing, the temptation to sit in the village was just too great and for a little while that was okay, as a sole BEF section limped forward, taking sporadic fire in between covering smoke. However, as this was happening, a senior leader had established a strong firing line in the woods and was steadily chipping away at the German section in the orchard.. a couple of junior officer hits and poor 'bad things happen' rolls, meant that my wobbly force morale was waning.

Too late I decided to get some more troops on the table to see if I could remove the advanced British infantry and get some fire into the woods.

We'd  decided ahead of time to try to wrap up after 3 hours (before it got too hot!) and the loss of an LMG team and another force morale point decided it for me.. it was unlikely that I was going to take 10 morale points off Tom and hang on to what I had.. so a retreat was called, much to the relief of the unenthusiastic Germans.

Interesting in that the Germans had a lot of manpower on the table, and some really solid positions too.. but morale was the decider.

We've put some effort over recent months into building up the terrain for these games and it was pleasing to see it coming together


The Patrol phase ended with the Germans holding good positions in the village

The BEF should have to cross some fairly open ground to reach the village

One section pushed forward, taking fire from the Germans in the windows of the 'Long House'

One German section took up positions in the Orchard

The British firing line in the woods kept up effective fire all morning

A medical orderly rushes to tend to a wounded junior officer

smoke from the 2" mortar screened the infantry advance

The German 50mm mortar poured ineffective HE fire into the British in the woods

An overview of the table

Too little too late, a German section pushes out of the edge of the village

Jean-Claude's wheelbarrow takes another smoke round from the BEF mortars

The overwhelming British fire starts to tell..

Another late dash as the fourth section reluctantly enters the village


But as lunch time approached, it was a little too much for the Germans, who fell back to their start line


Sunday, 6 June 2021

Boots on the table.. a 1940 game

Every wargamer in the western world seems to be posting 'first game back at the table' posts on social media these days.. here's another one!

Yesterday I took a short trip over to Toms wargames shed for a game of 'Chain of Command'.

About a year ago we agreed to have a go at a 1940 campaign and during lockdown we've been building up forces and terrain to play the 'Fighting Withdrawal' mini campaign from the TooFatLardies Summer 2016 magazine.. I'm playing Germans and Tom the BEF.

Neither of us have had lots of CoC experience (yes, yes..) so a 'practice game' was agreed. Tom set out the terrain before I arrived with a silly amount of boxes, adding a few bits to the table. We decided to play the Attack/Defence scenario from the main book, with Tom fielding a 1939 regular platoon, and me taking the 2nd Wave German platoon, both from the 1940 handbook.

As tempted as I was to take a StugIII for support, (because I have one), I settled on a pre-game barrage, the IG18 infantry gun and an armoured car (SDkfz221).. all of which proved to be pretty essential players on team Deutschland today. The BEF as I recall, brought a Vickers HMG, a Boyes AT.. and I think an adjutant.

I won't  go through the game blow by blow.. the patrol phase was a disaster for me.. rolling a 1 for initial moves and some questionable placement, meant I was starting on the table edge and going to have to work hard to push into cover and force some morale checks. The pre-game barrage really worked in my favour here, limiting Tom's ability to bring stuff on, and encouraging me to get as much on the table as soon as I could before that advantage was lost.

The infantry gun did solid work, I seemed to get a 1 on every turn, keeping heads down, and by the time the first turn was up, I was in a slightly better position to push.. actually taking one of the BEF jump offs and using a CoC dice to end the next turn. Not long before that I had actually said that I thought this was going to be a very quick game with the Germans coming off worse, as the initial force morale setbacks were all on me. Such a pessimist!

Tom used Ambush to spring an Boyes AT attack on my stationary Armoured car, but the shot missed, and although the team worked their way around the field for another shot, that one bounced.

We played until the BEF were down to 3 or 4 Force morale points.. the Germans weren't much better at 6, but we agreed that the outcome seemed pretty certain, with pressure on remaining jump offs and not much of the BEF remaining on the table.. Tom called a withdrawal, leaving the field to the Germans.

It was great to get back to 'proper' gaming and despite inevitable rules mistakes, we enjoyed the game. Might be another 'warm up' next.. or perhaps we'll just jump into the campaign.


Infantry sections advance under Bren fire

German senior officers were very useful
German senior officers proved very useful

Germans mass their fire 

A cautious approach

Sdkfz221 adding MG fire

Plucky BEF HMG team under heavy fire

The Germans try to sweep around the British held buildings

A horrible German patrol phase!